|
Getting your Trinity Audio player ready...
|
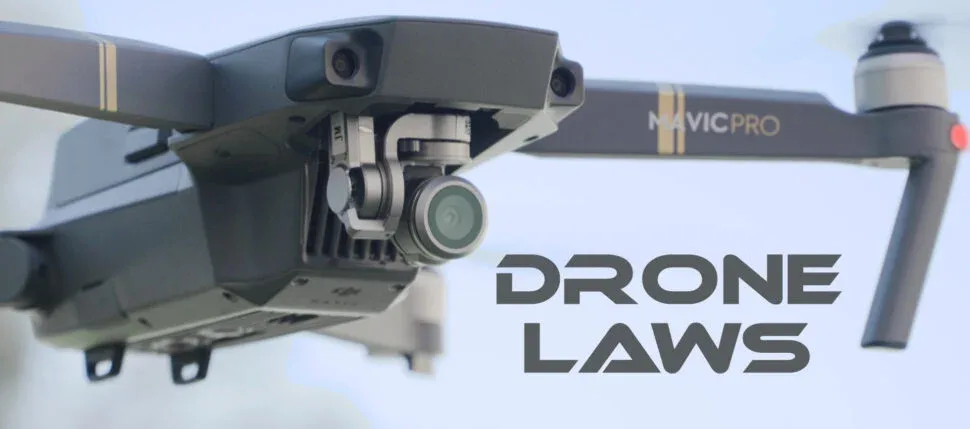
Drone flying is rapidly becoming one of the largest trending activities around the world. A huge number of hobbyists as well as professional filmmakers are buying commercial-grade drones. The drone is a piece of intricate and advanced technology and should never be treated and used as a toy, even when flying it as a hobby. This innovative technological invention should always be handled with care and utmost responsibility.
Before you buy a drone, ensure that it complies with the individual drone flying laws in your country. Although many countries are now allowing drone flying by individuals there are strict regulations guiding the sale, purchase and flying one. Ensure that you have the appropriate UAV (Unmanned Aerial Vehicle) registration and piloting license, according to the regulations of your specific country.
Buying a drone is quite easy. There are numerous choices to choose from online. Once you have your drone in hand you need to be careful when assembling it. Follow the instructions explicitly given on the user’s manual that comes with the drone packaging.
Once you have the drone ready, check these points off the pre-flight checklist:
Area & Atmosphere
Check the surroundings for:
- Wires and cables
- People
- Animals
- Property in your field of vision
- Sufficient distance from non-participants in drone flying
- Sufficient space to maintain between the drone and personnel
- Safe take-off and landing zones
- Alternate efficient take-off and landing sites
- Weather conditions – Temperature, Visibility, Precipitation, Wind Speeds (altitude/upper winds and rotor winds on lee side of large objects)
Discuss your flight plan with your co-pilot or spotter. Always keep a first-aid kit handy when flying your drone, especially in outdoor spaces.
Drone & Accessories
Ensure that your drone has:
- No cracks in, or loose, structure
- No loose/damaged screws, straps, ties and fasteners
- No damaged/loose wiring
- No loose/damaged plugs, connectors, soldering, etc
- Tight accessory-mounts and screws
- Clear and firmly attached camera lens
- Ideal camera settings
- Batteries are sufficiently charged, properly attached and secured in their places
- All Fail-Safe systems are working – RTH (Return To Home), Recovery Chute, Firmware Airport Proximity Detector
- Smoothly-running propellers, and are damage/crack free
- The propeller adapters are tightly attached and secured
- Ideal time-out/arming properly configured
- The right range and centering for all sticks in the Remote Control (RC)
- A successful range test
Pre-Flight checkup
Check these items of the pre-flight checklist just before launching your drone:
- All transmitters, camera and on-board aircraft batteries are completely charged
- There are no frequency conflicts between the transmitter/receiver and video transmissions
- All components and accessories are firmly secured in place with no loose or damaged parts on the drone
- Landing gear is in working condition
- Electrical connections are working fine
- Camera and other equipments are attached securely and are functioning smoothly
- GPS equipment controlling Auto-Pilot is functioning efficiently
- In Stabilization Mode, ensure control surfaces shift to the correct positions
- The take-off location is level
- Power-up FPV (Goggles)/Ground station monitors
- Power up Camera on drone
- Insert an empty and functioning SD memory card in the camera
- Start filming/photography mode on Camera
- Transmitter controls are moving freely in every direction, trim in neutral position and transmitter throttle is at zero
- Power on Radio Transmitter
- Power On Battery supply
- Check LED indicators and audible tones are working
- Switch on Timer (if required)
- Scan nearby surroundings for people, birds, animals, vehicles, etc
- Power on Flight Controller
- Hover for around 20 to 30 seconds at about 3 to 5 feet above ground initially to check for loose parts and other abnormal vibration and noises
- Check voltage levels are proper
Once you have checked off these points from the pre-flight checklist then you are good to go!
Getting Started with Your DJI Mavic Pro – DJI Mavic Pro Easy Setup Guide
The DJI Mavic Pro is one of the largest selling commercial drones in the world today. The Chinese brand has maintained its tradition of offering the sleekest and most advanced drone at quite an affordable price.
Take a look at the easy DJI Mavic Pro setup guide by Freewell:
- Unpack – Once your new DJI Mavic Pro drone is delivered, take everything inside out of the packing. Ensure that all parts/components/accessories are intact and not missing.
- Check batteries – The Mavic battery plug fits into the power supply in reverse and starts to charge automatically when working fine. The lights on the battery will turn off when the battery is fully charged. Plug in the micro-USB cable into the left side of the controller and the other end into the Mavic power supply. Charge your smartphone with the additional USB port in the Mavic power supply.
- Connect phone and controller – A micro-USB cable is given for connecting the Android-powered smartphone (Lightning Cable for connecting iOS smartphones) to the controllers. Tale the phone out of any protective additional casing to ensure the best fit in the controller mount.
- Install and Launch GO App – Download, install and launch the DJI GO App, from the Google Play Store/App Store. You will need to create a DJI account before using the installed app.
- Download/update firmware – Ensure that your phone is connected to the controller and the Mavic Pro drone and has a working high-speed internet connection. Press the power buttons on the Mavic Pro and the controller, and hold it down for powering on both the gadgets. If the picture on the DJI GO app does not notify about an upgrade to the existing firmware, then you can probably restart the app. If any update is notified of, then simply download it and install, once done. The Mavic Pro and the remote controller will restart once the firmware is updated.
- Attaching propellers – There are two different types of propellers that are available with the DJI Mavic Pro. The first type of propeller will have a white ring near the base, which matches with the white rings on specific motors. These indicate that the propellers are to be fitted here, and vice versa, for those propellers without the white rings. Align the notches given on propeller mount exactly with the holes in the motors. Push down steadily and rotate at the same time for locking the propellers into place.
- Calibrate compass – Calibrating the compass is one of the essential checks before you begin flying your DJI Mavic Pro. This needs to be done before you fly your drone, every single time. The app will also notify in case the compass needs to be calibrated. To calibrate the compass, ensure that the Mavic is unfolded. Turn on the power to the Mavic Pro drone and the controller. Connect your smartphone and launch the DJI GO App. Tap on the blue camera icon. This shows a live video feed, and also has all settings for the drone and the camera in this. Tap on the colored bar at the top then select ‘Calibrate Compass’ from the ‘Compass’ section. Follow the easy instructions and calibrate your drone compass easily.
- Take-Off – This is by far the easiest step of them all. Ensure that there is at least 10 feet of space free, around the take-off zone. Wait for the drone to establish its home point, right after it hovers above ground initially. Tap on the ‘TAKE OFF’ button and slide your finger to launch the drone successfully.
Make sure to check every item off this check-list before launching your DJI Mavic Pro drone.
Getting Started with Your DJI Spark – DJI Spark Easy Setup Guide
DJI Spark is one of the smallest, yet powerful, drones from the Chinese brand. The company has made the ‘Selfie’ drone with innovative technology to ensure enhanced control and maneuverability.
Check this step-by-step checklist for launching your DJI Spark drone by Freewell:
- Unpacking and Checking – Once you have carefully unpacked the DJI Spark drone packaging, check if every specified component is present and is top working condition. Check for scratches and other damage which can be visible with the naked eye all along the outer covering of the drone. The DJI Spark comes with the batteries and propellers already installed, unlike other larger drones which are usually folded and kept with the batteries excluded. Check the camera, sensor, propellers, battery, covering, etc for damage.
- Battery charging – After unpacking is done, it’s time to check the batteries provided with the drone and the remote controllers. Simply insert the micro-USB cable if you are using an Android smartphone for connecting. For Apple users, there is a Lightning Cable. Connect the cable to the port given at the back of the drone and other end to the controller.
- Insert SD card – Once the batteries are completely charged you will need to insert an empty micro SD card into the slot. This is also at the back of the drone.
- Power on – To power on the drone, press the small power button once then release it. Press again for a couple of seconds longer until you see the indicator lights flashing. To turn off the drone, follow the same procedure.
- Update firmware – Once you open the DJI GO App, there will be a notification if there is an update available for the firmware of your DJI Spark. Once your click on ‘Update’ the drone starts to use the smartphone data/W—Fi connectivity to update the existing firmware. You can also make the necessary changes in the flight systems/controls and camera settings using the DJI GO app.
- Take-Off – Once the firmware is updated and the pre-flight checklist is performed, you can begin the launching sequence for your DJI Spark. Ensure that the take-off zone is clear all around for at least 10 feet and is level.
Always be responsible when flying your DJI Spark drone.
Getting Started with Your DJI Phantom 4 Pro – DJI Phantom 4 Pro Easy Setup Guide
The DJI Phantom 4 Pro is one of the best-selling commercial drones from the Chinese drone-makers. The Phantom 4 Pro offers optimum flying experience with excellent quality photography and footage.
Check these simple steps for setting up your DJI Phantom 4 Pro by Freewell:
- Unpacking – Unpack the new DJI Phantom 4 Pro carefully. Check to see first whether all the components advertised with the main product are present in the box. Then, check the drone and other components for damage. Ensure that each part of the drone and its components are in working condition.
- Read User Manual – Read the accompanying User’s Manual that comes with the DJI Phantom 4 Pro. This will help to install and attach all necessary components, such as the batteries and the propellers.
- Charging batteries – Connect the batteries from the DJI Phantom 4 Pro drone and the remote controller with the power supply. Ensure that the batteries, along with the smartphone batteries are completely charged. The larger connector cord is to charge the Phantom 4 Pro drone while the smaller connector cord is used for charging your remote control. Once the batteries are fully charged the indicator lights will turn off automatically.
- Install GO App – The DJI GO App is vital for ensuring smooth and convenient drone flying experience. Connect your Android-powered smartphone to the controller and drone using the micro-USB cable provided with it. In case you are using Apple iOs-based smartphones, you will need a Lightning Cable to connect with the controllers and the Phantom 4 Pro. Download the DJI GO App from the Google Play Store/App Store and install it completely. Create a DJI account (if you don’t have an existing one) to use the DJI GO app efficiently. Check the app for firmware updates. Update the firmware, if indicated.
- Connecting – After the batteries are completely charged and attached, it is time to begin the pre-flight check-list. Plug your smartphone to the Phantom 4 Pro remote control using the micro-USB cable/Lightning Cable. Tap the power button on the remote controller once, release and press again for a couple of seconds longer. Ensure that the plastic cover from the landing gear, protecting the camera, is removed before take-off. Turn on the Phantom 4 Pro drone by pressing the power button once and holding it for a few seconds till the beep is heard.
- Take-Off – Once the drone and remote controllers are powered on, navigate the DJI GO App and press the blue camera icon. This will show you the live video feed from the drone camera. A menu also pops-up, showing the Aircraft Status. This is useful for checking and changing settings for flying and controlling the drone. Once you have calibrated the compass, ensure that the surrounding area, near the take-off zone, is clear of obstacles and people.
Follow the drone flying guidelines for your country precisely to enjoy a hassle-free and efficient drone flying experience.